Shopping from Australia, Canada, NZ or Elsewhere? Tap here to switch to your local store →

Shopping from Australia, Canada, NZ or Elsewhere? Tap here to switch to your local store →

Shop by Region

Search

FAQ

Shipping, Order Placement, Returns, Refunds and Cancellations

Shipping Destinations

We currently ship throughout the United States and to most international destinations.

All U.S. orders are fulfilled from our Texas warehouse for faster delivery and no additional import duties or tariffs.

Shipping Times

Most U.S. orders ship via UPS within 1–2 business days and typically arrive within 3–7 business days, depending on your location.

Orders that are shipped Factory Direct (from our overseas warehouse) generally take 11+ business days to arrive.

For international orders, please refer to our Shipping Policy for region-specific delivery estimates.

Shipping Costs

Shipping rates are automatically calculated at checkout based on your order size, weight, and destination.

All U.S. orders include tracked and insured shipping for peace of mind.

Free local pickup is currently not available for U.S. orders.

For full details, please see our Shipping Policy.

At this time, we do not offer international shipping from our U.S. store.

Orders placed through this shop can only be shipped within the domestic United States.

If you are located outside the U.S., please visit one of our other regional stores:


Canada: allthingseffy.ca – ships within Canada and to most international destinations

Australia: allthingseffy.au – ships throughout Australia and to New Zealand

New Zealand & International: allthingseffy.com

We hope to offer international shipping from the U.S. in the future — thank you for your understanding.

You can select your preferred payment method at checkout.

We accept secure payments via Credit Card, Debit Card, PayPal, Shop Pay & Shop Pay in 4, Apple Pay, Google Pay.

All prices are listed in U.S. dollars (USD).

Section heading

Order Cancellations

No order cancellations are permitted once an order has been placed.

Please review your items carefully before completing checkout.

There are no refunds, exchanges, or returns on sale or clearance items.

Your satisfaction is important to us, and we do offer a conditional 30-day Return & Exchange Policy for eligible orders.

If a product arrives damaged or defective, we will offer a 100% refund once the item has been returned and inspected.

Some items may not be returnable — please refer to our full Returns & Refund Policy for complete details.

Timing: The 30-day return window begins on the day your item is received.

To be eligible for a return, goods must be unopened, unused, undamaged, and accompanied by proof of purchase.

To request a return, please email hello@allthingseffy.com with the subject “Return Request” and include your order number, name, and a brief explanation of the issue.

Once approved, we’ll provide return instructions.

Customers are responsible for the shipping costs of returned items, and we recommend obtaining proof of postage to prevent lost-package issues.

Every return may be subject to a restocking fee.

When EFFY makes an exception for a return, refunds are typically issued as store credit. However we will approach this on a case by case basis.

Simply add the items you’d like to your shopping cart while browsing our store.

When you’re ready to check out, go to your cart and click “Checkout.” Follow the prompts to enter your shipping details and select your payment method.

Orders are typically processed and shipped within one business day if all items in your order are in stock and not a pre-order.

Please consider your purchase carefully, as we do not accept order cancellations once an order has been placed.

If your order is flagged as potentially fraudulent, we may need to contact you for additional verification before your order can proceed.

To help avoid this situation:


Ensure that your billing and shipping addresses match and are entered accurately.

Use your own credit card so that the name on the card matches the name on the order.

Try to place your order from your usual location. Shopify’s security systems are highly sensitive to inconsistencies, such as placing an order while you are far from your listed shipping address.

We’re always happy to help if you have any questions — just reach out to hello@allthingseffy.com.

Provide the answer to the question here.

Factory Direct Orders

What Is Factory Direct Shipping and What Does It Mean for My Order?

Factory Direct shipping means your order is shipped directly from our overseas warehouse rather than from our U.S. warehouse in Texas.

Items shipped Factory Direct are typically products that are not stocked locally or are special-order items.

All Factory Direct orders are shipped with duties and tariffs prepaid, so there are no additional fees for U.S. customers.

You’ll still receive our 6-month warranty on all EFFY tufting machines, including the AK-V, AK-I, AK-II, and AK Duo, along with the same customer support, product guidance, returns, refunds, and exchanges as if your order shipped directly from us.

Factory Direct orders generally take 11–20 business days to arrive, though most shipments are delivered within 7–11 business days.

Tracking numbers for Factory Direct shipments are provided manually, not automatically.

This means you will not receive tracking immediately after placing your order.

We typically send tracking information within four business days, once the parcel has been confirmed in transit.

In many cases, your package will already be well on its way by the time you receive tracking details.

Please rest assured that your order is actively being processed and shipped during this time — the tracking delay is simply part of the manual international fulfillment process.

If you have any concerns or haven’t received tracking after four business days, feel free to reach out to hello@allthingseffy.com and we’ll gladly assist.

All orders are shipped with tracked delivery — we do not ship without tracking.

Once your order has been fulfilled, you will automatically receive an email with your tracking number.

It is your responsibility to monitor your tracking updates and ensure your parcel is successfully delivered.

Couriers do not always leave delivery cards when a delivery attempt is missed, so please check your tracking regularly to avoid parcels being held at a depot or returned to sender.

Once a parcel has left our warehouse, it becomes the customer’s responsibility to communicate directly with the courier regarding delivery updates, missed deliveries, or redelivery arrangements.

We are happy to assist if your parcel appears lost in transit or if you are struggling to arrange redelivery, but please contact us only if necessary so we can prioritize urgent cases.

Please also note that couriers will follow the delivery preferences listed on your address — for example, if your address allows parcels to be left without a signature, your parcel may be left at your doorstep. We do not control that aspect of delivery.

If you have any concerns about tracking or delivery, you can reach us at hello@allthingseffy.com.

Warranty

Six-Month Warranty on Tufting Machines

We offer a 6-month warranty on all brand-new AK-V, AK-I, AK-II, and AK Duo tufting machines.

If your machine develops a fault within the first six months that is not caused by user error, we will repair it free of charge — and if a repair is not possible, we will replace the machine entirely.

Please note that we are highly experienced with these machines and can easily identify whether a mechanical or electrical issue has occurred due to user error (for example, dropping the machine, striking it against the frame, incorrect adjustments, poor storage, or lack of maintenance).

We do not recommend adjusting the pile height on your tufting machine while it is under warranty.

While it is technically possible, the process can be challenging for some users and often leads to unnecessary errors or internal damage.

Because of this, our policy is that any attempt to alter the pile height or open the machine will void your warranty.

This doesn’t mean you can’t explore adjustments later — if you’re technically confident, you’re welcome to try after your warranty period has ended.

However, during the first six months, we strongly recommend keeping your machine as it arrived — unmodified, well-oiled, clean, stored at room temperature, and kept free from moisture.

This will ensure your warranty remains valid and your machine continues to perform at its best.

Additionally, we do not support or warranty the use of hessian, plastic, or other non-primary tufting cloths.

Only EFFY Primary Tufting Cloth or other grade primary tufting cloths are suitable for use with tufting machines.

Using non-approved fabrics will void your warranty.

Even if a problem arises from user error, we’re always here to help. We offer:


  • Servicing and repairs at very reasonable prices

  • Tutorials and support to help you adjust and maintain your machine correctly

  • Replacement parts, with most items kept in stock

You can learn more about our warranty process here, or explore our Extended Warranty Options for added peace of mind.

About EFFY

About Us

All Things EFFY was established in 2018 and has evolved through several rebrands as our business and product range have grown.

We were one of the first stores in the world to begin selling tufting equipment and supplies back in 2019, and we continue to take great pride in our knowledge, experience, and passion for the craft.

While many people have played a role in keeping EFFY running smoothly, the principal owner and operator is Carolyn. She manages all aspects of the business — from social media and customer service to importing, logistics, and website maintenance. Carolyn personally tests every piece of equipment and continuously searches for the best tufting and punch-needling products available worldwide.

Over the years, she has helped introduce several now well-known products to the tufting community — including the AK-V tufting machine, Long Pile Duo, Rosewood Carver, and the first Rosewood Carving Guide, developed in collaboration with EFFY’s local woodworker. (A special thank-you also goes to Myra and Jean, whose inspiration helped bring the Rosewood Carver to life!)

EFFY is a family-run business, originally based in Christchurch, New Zealand. In 2023, we expanded to Vancouver, Canada (Carolyn’s hometown), in 2024 to Sydney, Australia, and now in 2025, to Texas, USA.

These expansions now allow us to offer faster, more affordable shipping to customers across Canada, the USA, and Australia, compared to our early days shipping solely from New Zealand.

While EFFY has had several wonderful part-time team members over the years, as of mid-2023, the business is almost entirely operated by Carolyn. She does her absolute best to share her favorite crafts with you in the most enjoyable and accessible way possible.

Carolyn extends her heartfelt thanks to her friends, family, and husband for their constant encouragement, and to EFFY’s amazing community of customers — your patience, loyalty, and enthusiasm are what make this journey possible.

Without you, All Things EFFY would not be one of the world’s leading suppliers of tufting tools and materials.

Thank you for being part of our story.

We’re thrilled to now serve our U.S. customers directly from our Texas warehouse, making it easier than ever to access the tools and supplies you love.

If you’d like to know more about All Things EFFY — just ask!

You may be wondering where our brand name comes from — especially since “EFFY” isn’t a person’s name!

Unlike most tufting shops, we don’t have “Rug Tufting” in our name, and that’s entirely intentional. The name All Things EFFY actually comes from Carolyn’s original handmade brand, created long before tufting came into the picture.

Back in around 2005, Carolyn began selling her own fiber art and craft creations on Etsy under the name “Eye Felt For You – Fiber Art Crafts.” Over time, as she continued to sell her work and eventually moved to New Zealand, the name gradually shortened and evolved into “EFFY.”

When Carolyn later launched her rug tufting shop, she chose to carry that name forward. It felt personal, meaningful, and true to her creative roots, while also giving the brand room to grow beyond rug tufting.

In fact, EFFY originally sold punch-needle supplies before expanding into tufting — and these products are still available exclusively through our New Zealand shop at allthingsfe.co.nz.

We haven’t yet expanded the punch-needle range to our other regional stores, but it remains an important part of EFFY’s creative foundation.

So, no — EFFY isn’t a person, and it’s certainly not “everything about Carolyn.”

It’s a name that represents evolution, creativity, and a lifelong love of fiber art.

What is rug tufting?

Rug tufting is a wonderfully creative craft that lets you design and make your own rugs at home using either manual tufting tools or electric handheld tufting guns.

Why have tufting guns become so wildly popular? In my opinion, it’s because almost anyone can do it — and it offers instant gratification. Within 15 minutes, you’ll start to see your design take shape, and in just a few hours you can finish your very own rug. Brilliant, eh?

With tufting guns, punch needles, and speed tufting tools, you’re not limited to rugs — you can create pillows, wall hangings, art panels, stool covers, chair covers, and so much more. Essentially, if you can imagine a surface that could use a soft, fluffy texture — you can tuft it! The possibilities are endless.

You don’t need to be an artist to start tufting. Simply choose a design you love (or one of our available patterns), trace it onto your fabric, and “paint by numbers with yarn.”

Just remember to respect copyright laws and avoid reproducing other artists’ original works without permission.

Rug tufting is the process used to produce a hand-tufted rug. The fabric is first stretched tightly over a frame, and a design is applied to the surface. A tufting gun is then used to shoot yarn through the fabric, moving either horizontally or vertically along the design.

As you guide the gun upward, it creates yarn loops or cut pile (depending on your machine or settings) on one side, and a stitch on the other side with each cycle of the gun.
These cycles happen rapidly — typically between 5 and 40 stitches per second, depending on the tufting gun model you’re using.

What Do I Need to Tuft a Rug?

Here’s what you absolutely need to start tufting:


Foundation Fabric – Specifically designed for rug tufting to withstand the force of the gun.

Tufting Frame – Used to stretch your fabric; it should be pulled tight like a drum.

Tufting Gun, Punch Needle, or Manual Speed Tufting Tool – Depending on your preferred method.

Yarn – Choose a suitable tufting yarn for your project. For durable, long-lasting results, we highly recommend EFFY Rug Wool or EFFY 100% Acrylic Rug Yarn.

Design – A pattern or artwork to trace onto your fabric.

Latex Adhesive – To seal and secure the back of your rug.

Secondary Backing – To give the back of your rug a neat, finished look.

Spray Adhesive – For applying the secondary backing.

Fabric Glue or Glue Gun – To attach your rug binding neatly.

Rug Binding – For finishing the edges of your rug and reinforcing the most vulnerable part of your rug, as edges are prone to fraying.

Optional, but very handy tools:

Assorted Scissors – For trimming and shaping your rug pile.

Rug Carver – For evening out the surface and carving clean lines or textures.

Cut Pile:

Cut pile tufting guns have small scissors that cut the yarn or wool after the needle pushes it through the fabric. This creates hundreds of individual tufts, resulting in a soft, fluffy finish with a higher pile height than loop pile.

Cut pile rugs can also be trimmed and sculpted after tufting using bent tip scissors, curved scissors, duckbill scissors, and other assorted types of scissors, or various rug carving tools to create shape and texture.

Because each tuft in a cut pile rug is separate, the rug must be sealed with latex adhesive on the back to prevent yarns from pulling out over time.

Loop Pile:

Loop pile tufting guns form continuous loops of yarn through the fabric instead of cutting them. The pile height of these loops is about half the height of a cut pile. The finished rug is soft, durable, and stable, though not as fluffy as cut pile.

One of the benefits of loop pile is that it does not technically require a latex adhesive backing. Since all the loops are part of one continuous strand and packed tightly together, the rug is very resistant to unraveling. Many loop pile rugs can be left as-is and simply finished with binding along the edges to prevent fraying.

For added texture and visual interest, consider mixing both cut and loop pile within the same rug!

Yes — loop pile tufting is generally more challenging than cut pile, especially for beginners.

Cut pile is very forgiving. If your tufting isn’t perfectly even or your spacing varies slightly, it’s usually not noticeable once your rug is finished. Minor inconsistencies, like tilting the gun slightly or pressing harder in one area, can easily be corrected later when you shave or carve the surface. After trimming, most small errors simply disappear — which makes cut pile the best choice for those just starting out.

Loop pile, on the other hand, requires a bit more skill and patience. Because the yarn isn’t cut, your loops must be even and consistent — and that takes practice.

Here are some factors that make loop pile more sensitive:


  • The gun must stay perfectly perpendicular to the cloth at all times. Any tilt will cause uneven loops.

  • Inconsistent pressure while tufting (pressing harder or lighter) will create irregular loop heights.

  • Uneven fabric tension — areas of the cloth that are looser or tighter — will also affect the look of your loops.

If you want a smooth, uniform loop pile rug, it may take time to develop the right control and rhythm. That said, some people love the natural variation in texture that comes from imperfect loops — it can give the rug a beautiful, organic look.

Another key difference is that loop pile guns don’t cut the yarn automatically. This means that after finishing each line or section, you’ll need to manually cut the yarn before moving to another part of your design. Experienced loop tufters often keep scissors handy — sometimes even attached to a lanyard or the gun — for quick snipping as they work.

For most beginners, we recommend starting with a cut pile tufting gun (like the AK-V). Once you’re confident with the technique, you can explore a loop pile model (such as the AK-II or AK-DUO) for more advanced projects.

What Should I Know About Switching Between Cut and Loop Pile?

This is a question we get asked far too often — and for good reason! Switching between cut and loop pile can be confusing if you’ve never done it before.

First, the AK-DUO is the only dedicated cut-and-loop pile tufting gun on the market — hence the name DUO. However, it’s important to understand that switching between the two modes is a manual process, not a quick toggle or switch.

It involves removing the scissors assembly and installing the loop pile head using screwdrivers and Allen keys. It’s not difficult, but it does take a bit of care and patience.

You can watch our video on how to change from the scissor head to the loop pile head on the AK-DUO here:

👉 https://youtu.be/hott4iIbx9k?si=QcPqc-3YBFkobOzt

This video shows the process when the machine is set to 13 mm pile height, but the same basic rules apply regardless of pile height.

We strongly recommend watching this video before deciding whether the AK-DUO is the right machine for you.

That said, any tufting gun can technically do loop pile with a simple modification (often referred to as the loop pile hack). These guns just don’t have a dedicated loop pile head like the AK-DUO does. Personally, I often enjoy the loop results created using this method — even compared to the dedicated DUO.

For our Hi-Pile DUO and Mid-Pile DUO models, loop pile can only be achieved using this hack as well.

You can watch our video on how to use your Hi-Pile DUO as a loop pile gun here:

👉 https://youtu.be/4wzIX6-Yp3I?si=GFng2Xlc5M8zz7JO

The process shown in this video applies to virtually any tufting gun, as they all share the same open/close mechanism.

Essentially, you’re preventing the scissors from fully closing, which creates a loop pile effect instead of a cut.

If you want to try this, we highly recommend using a pair of digital or manual calipers.

Why? Calipers have a depth-measurement arm, allowing you to measure how far your scissors are closing and record that measurement. This makes it easy to return to your original cut-pile settings later on — especially if you’re not yet completely familiar with the tufting gun’s cycle.

This step is extremely important because with tufting machines, even a 0.1 mm difference in adjustment can affect performance. That’s true for every brand and model — it’s simply the nature of how these machines work.

So, before diving in, make sure you’ve watched the videos, have your tools ready, and take it slow the first time. Once you understand the process, switching between cut and loop pile becomes much easier (and a lot less intimidating).

What Tools Do I Need to Switch Between Cut and Loop Pile?

If you’re simply performing the loop pile hack or switching your tufting gun from loop pile to scissors, the tools you’ll need depend on the process.

For the loop pile hack (any standard tufting gun):


Allen key – The same one that comes with your machine.

Digital calipers (recommended) – To take a depth measurement before making any changes. This lets you easily reset your scissor closer to its original position afterward.

For the AK-DUO (switching between heads):

The process is more involved and requires a few additional tools:


Digital calipers – Essential for taking measurements before and after adjustments.

Allen keys – For removing and reinstalling the scissor assembly and loop pile head.

Adjustable wrench – To loosen and tighten the necessary fittings.

Phillips head screwdriver – Used for specific screws on the AK-DUO head and scissor mechanism.

It’s extremely important to record your measurements before making any adjustments — even a small difference (as little as 0.1 mm) can affect how smoothly your machine runs. Taking your time and staying precise will make reassembly much easier and prevent unnecessary frustration later.

Machine and Carver Maintenance

This process is definitely easier to understand visually, but here’s a clear written guide to help you get it right.

1. Make Sure the Yarn Flows Freely

Before anything else, make sure your yarn or wool is flowing freely.

This isn’t just about preventing tangles — it’s about maintaining consistent tension, which is absolutely crucial for tufting.

If there’s too much tension, your yarn may pull out of the gun (especially with cut pile guns), or your pile height may become uneven across your rug.

For the best results:


  • Use EFFY yarns on cones, which are designed to pull evenly.

  • If you’re using skeins, wind them into cakes and pull from the center for smooth, consistent feeding.

We sell two types of yarn winders to make this easy:


  • A small, affordable plastic yarn winder that makes cakes up to 1.8 oz (50 g) — perfect for small projects or testing colors.

  • A heavy-duty metal yarn winder that can handle cakes up to 17.6 oz (500 g) — ideal for larger projects and daily use.

Having your yarn flow freely and evenly into the gun ensures that your tufting runs smoothly, your loops stay consistent, and your finished rug looks professional.

2. Always Turn Off the Machine Before Threading

Before threading, make sure your tufting gun is switched off and the cord is safely out of the way.

Never attempt to thread the gun while it’s powered on — accidentally pulling the trigger can cause the needle to move at high speed and result in serious injury.

3. Feed the Yarn Through the Eyelet on Your Frame

Your yarn should feed from above the gun, not from the side or below.

Run the yarn through the eyelet mounted at the top of your frame (or use a simple hook, clamp, or pulley).

This overhead feed maintains even tension and helps the yarn glide smoothly into the machine.

4. Identify the Two Threading Points on Your Tufting Gun

There are two parts of the tufting gun that your yarn needs to pass through:


  1. The Yarn Guide — This is the small coiled wire eyelet at the top of your gun. It keeps the yarn flowing smoothly and prevents it from catching or rubbing against any parts of the machine.

  2. The Needle Tip — This is the hollow metal needle at the front of your gun that drives the yarn through the tufting cloth.

Both parts need to be threaded correctly for your yarn to feed properly.

5. How to Thread the Tufting Gun


  1. Take your tufting gun threader and insert it up through the needle tip — starting from the open side of the needle (the part that faces you) and pushing it through to the closed side (the back of the needle).

  2. If you’re using our EFFY Tufting Gun Threaders, they’re long enough to reach through the yarn guide as well. Push the threader through both the needle and the yarn guide in one smooth motion.

  3. Loop your yarn through the wire loop at the end of the threader.

  4. Gently pull the threader back through the yarn guide first, and then back through the needle tip, pulling the yarn along with it.

We sell Tufting Gun Threaders in convenient 3-packs, making this step quick and frustration-free.

You can also make your own threader using thin craft wire — just make sure it’s long enough to reach from the tip of the needle through the yarn guide for easy threading.

6. Leave a Small Tail of Yarn Hanging Down

Once threaded, pull about 2 inches (5 cm) of yarn through the needle so a small tail hangs down before you start tufting.

This helps the first few stitches anchor securely into the cloth.

As you gain experience, you can leave shorter tails to reduce waste — every little bit adds up over time.

Tip:

Smooth, consistent yarn flow is the key to great tufting. When the yarn moves freely, your machine runs smoothly, your pile height stays even, and you’ll spend more time tufting and less time rethreading.

Provide the answer to the question here.

What yarns do I use for Tufting?

Choosing the right yarn for rug tufting makes all the difference to how your finished rug looks, feels, and lasts. At All Things EFFY, we offer three main types of yarn — each designed to suit different projects, budgets, and preferences.

1. EFFY 100% New Zealand Rug Wool

This is our most premium yarn and the ideal choice for long-lasting, high-traffic floor rugs. Made from 100% New Zealand wool (primarily from Romney sheep), this fiber is strong, resilient, and naturally beautiful.

Wool has a springy structure that helps rugs bounce back after compression, meaning they’ll keep their shape and fullness for years — even decades — of daily use. It’s biodegradable, moisture-wicking, flame-resistant, and easy to vacuum or clean once your rug has been properly backed and sealed.

Our EFFY Rug Wool comes on 1.1 lb (500 g) cones and is available in a rich range of vibrant, saturated colors thanks to New Zealand wool’s naturally pure white base. It’s the most premium option we offer and an investment in a rug that will truly stand the test of time.

2. EFFY 100% Acrylic Rug Yarn

If you prefer a non-wool option or are looking for something slightly more affordable, we also sell EFFY 100% Acrylic Rug Yarn.

This is a high-quality, durable acrylic yarn specifically designed for rug making — not knitting. Knitting acrylics are made to be soft and light against your skin, not to be walked on. Rug-grade acrylic yarn has structure and strength — it’s engineered so your finished rug won’t compress or flatten over time, similar to wool.

EFFY 100% Acrylic Rug Yarn maintains its stiffness and body, which is exactly what you want for a high-traffic floor rug. It’s durable, easy to work with, and gives a clean, defined finish when shaved or carved.

Each cone weighs 8.8 oz (250 g), meaning you don’t have to overbuy for smaller projects. It’s available in 38 shades, perfect for both bold and subtle color palettes.

3. EFFY Cotton Blend Yarn (80% Cotton / 20% Acrylic)

EFFY Cotton Blend is excellent for beginners — it’s affordable, easy to work with, and ideal for wall hangings, decorative pieces, and low-traffic rugs.

For rugs that will be stepped on regularly, we recommend our EFFY Rug Wool or EFFY Acrylic Rug Yarn for better durability.

Each cone weighs 7 oz (200 g) and the yarn measures roughly 0.2 inch (5 mm) thick. Because of this thickness, you only need to use one strand at a time in your tufting gun. You may need to slightly adjust your gun’s tip size so the yarn feeds smoothly and doesn’t slip out, but you’ll quickly find what works best for your setup.

If you try using two strands at once, keep in mind that your latex backing adhesive may not penetrate the fibers as deeply — especially since cotton has less structure than wool or acrylic. We recommend tufting densely to compress the fibers together and create a plush, even finish.

Our EFFY Cotton Blend Yarn comes in over 75 brilliant shades, all consistently stocked throughout the year so you can reorder colors easily. Dye lots are usually very consistent, but we also mark the batch date on each cone for reference. If you’re concerned about color matching, we strongly recommend buying enough of each color upfront to complete your rug — it’s always easier than trying to find the exact batch later.

Having access to this many consistent, in-stock colors is one of the biggest benefits of EFFY Cotton Blend. You’re not wasting time driving between stores, hunting for missing shades, or dealing with discontinued colors. We maintain a stable range across every color family — greens, blues, reds, pinks, neutrals, and everything in between — so you can plan, design, and work with confidence.

Each cone sells for $10 USD, with bulk discount codes available when purchasing multiple units.

To put this in perspective: if you were using regular knitting acrylic yarn, you’d likely need around four skeins to match the yardage of one cone of EFFY Cotton Blend. With most acrylic skeins costing $3–$5 each, that’s $12–$20 total, compared to just $10 for a single cone of EFFY Cotton Blend — already wound, ready to tuft, and designed specifically for rug making.

It’s an affordable, practical, and reliable yarn for anyone wanting to start tufting without compromising on results.

Mixing Yarns

We don’t generally recommend mixing all three yarn types within one rug, as each has a different texture, sheen, and density — which can look uneven in cut pile. However, you can usually mix EFFY Rug Wool with EFFY Acrylic Rug Yarn for a similar feel, or EFFY Acrylic with EFFY Cotton Blend for a textured look. Just keep in mind that consistency is key if you want a smooth, even surface.

Learn More and Get the Swatch Cards

If you’d like a deeper look at the three types of yarn, check out our YouTube video, where we go through the benefits and structure of each yarn type in detail.

We also sell swatch cards for every yarn line we offer — and we highly recommend getting the Swatch Card Bundle. It’s the easiest way to color-match your projects accurately and reorder confidently.

Colors can always look slightly different on screens — everyone’s monitor or phone displays hues a bit differently — so having the real samples on hand saves time and ensures perfect matching every time.

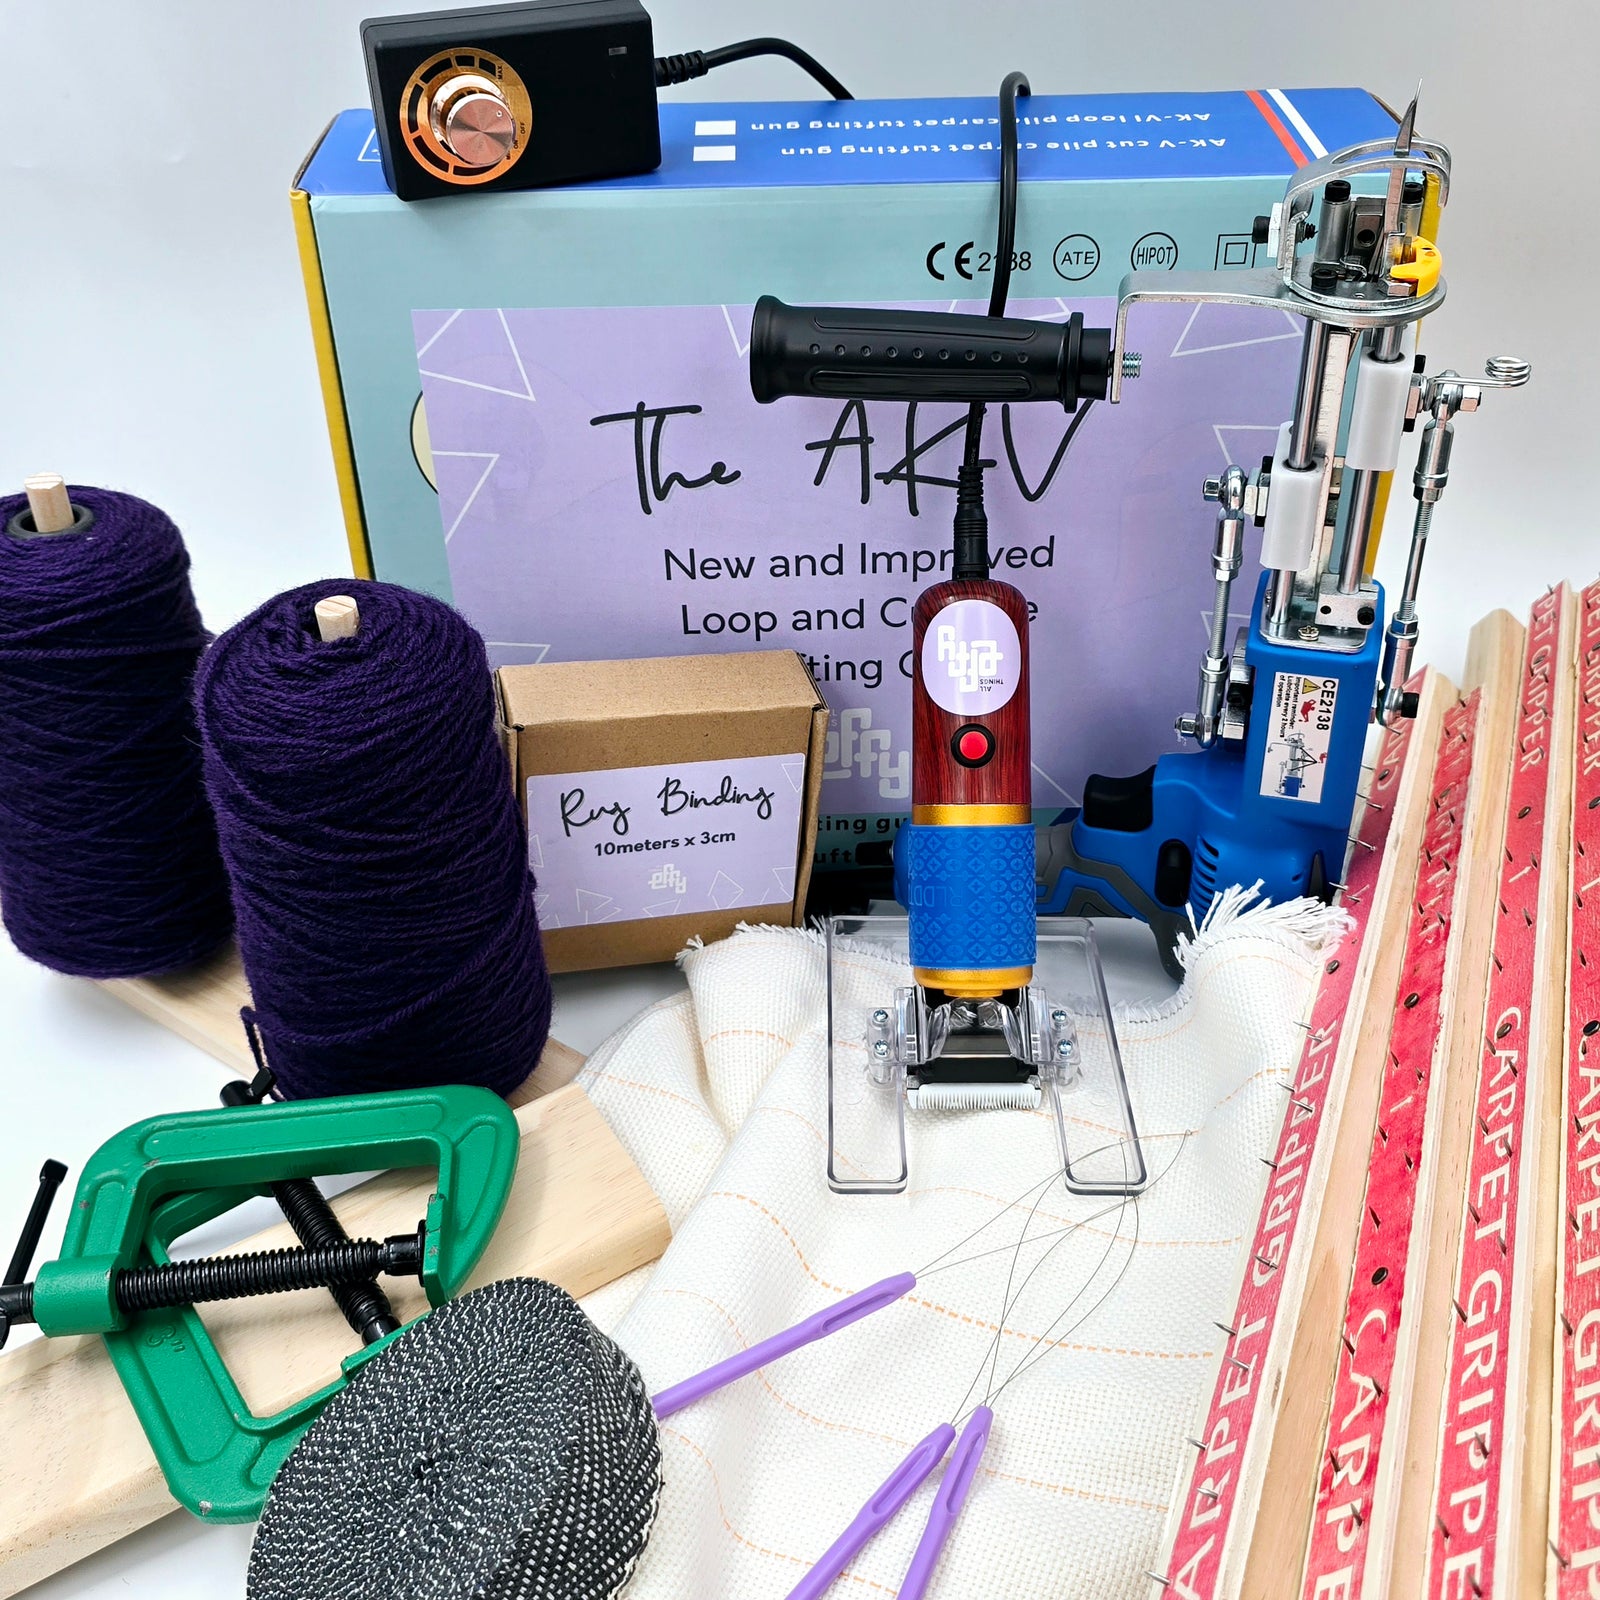
Why Choose 100% New Zealand Rug Wool for Tufting?

Please bear in mind that this answer has been written by Carolyn, the founder of All Things EFFY, a Canadian living in New Zealand. So yes — she has a definite soft spot for New Zealand rug wool. You’re hearing from someone who’s literally surrounded by sheep and wool farmers every day, and she’s not exaggerating when she says there are sheep everywhere. You’ll spot them on the hillsides, along fences, and even grazing near intersections.

To put it into perspective, New Zealand has around 25 million sheep and only 5 million people, so wool here isn’t just an industry — it’s part of everyday life.

There are so many reasons why rug wool is one of the best materials for tufting. It’s durable, long-lasting, natural, and beautiful to work with — but there’s much more to it than that.

A Healthier Choice for You and Your Workspace

When tufting or carving, you’ll often notice fine fibers and fluff in the air from the yarn you’re using. How great is it to know that you’re breathing in something natural and biodegradable rather than tiny plastic particles?

Wool is made by nature — acrylic is made from plastic. That’s one of the biggest advantages of working with natural fiber. It’s better for your lungs, your workspace, and the planet.

Wool is biodegradable, moisture-wicking, and naturally flame-resistant, and it delivers a softness and resilience that few other materials can match.

Other Benefits of New Zealand Wool for Rugs

100% natural and renewable — Each sheep regrows its fleece every year, making wool an endlessly renewable resource.

Biodegradable and recyclable — Wool breaks down naturally, releasing nutrients that benefit soil and plant life. It’s even used in insulation and horticulture because of these properties.

Naturally resilient — Wool fibers act like tiny springs, helping rugs bounce back to shape and reducing flattening or wear over time.

Resistant to stains and dirt — The fiber’s protective outer layer repels spills and grime, keeping rugs cleaner for longer.

Soft and luxurious underfoot — While wool on cones may feel coarse, once tufted into a cut-pile rug, it becomes beautifully soft and springy. At around 14 mm (0.55 inch) pile height, it truly feels like walking on a cloud.

Thermal and acoustic insulation — Wool helps regulate temperature and absorb sound, keeping spaces warmer in winter, cooler in summer, and quieter all year round.

Fire safety — Wool is resistant to extreme heat (up to about 1300 °F / 700 °C) and self-extinguishes once the flame source is removed. It doesn’t melt or emit toxic fumes, which is why wool blankets are often used for fire protection.

Naturally pure color — New Zealand wool is prized for its bright, clean fibers, which require fewer chemicals during processing. This purity allows dyes to absorb evenly, producing richer, more vibrant colors that hold their brilliance.

The Environment and Welfare Behind New Zealand Wool

New Zealand’s sheep graze across wide-open pastures and rolling green hills, breathing clean air in pristine environments far from industrial farming. This low-stress lifestyle produces stronger, cleaner, and higher-quality wool fibers. The mild climate and open terrain allow the sheep to roam freely, which keeps them healthy and relaxed — directly improving the quality and texture of their fleece.

New Zealand also enforces some of the strictest animal-welfare and environmental standards in the world. The result is wool that’s ethically produced, environmentally responsible, and consistently exceptional in quality — soft yet strong, pure yet durable.

A Note on Sensitivities and Allergies

Wool is generally hypoallergenic and safe for most people. If you’ve ever experienced irritation from wool, it’s often due to one of the following:

• The wool was blended with synthetic fibers.

• There was residual lanolin, a natural wax found in wool (rarely an issue, as our rug wool is fully cleaned).

• The fiber’s coarser texture caused skin irritation, which is a comfort issue rather than an immune reaction.

Another possibility is sensitivity to dyes or dyeing chemicals, but all of our EFFY 100% New Zealand Rug Wool is thoroughly washed after dyeing to remove any residues.

For all these reasons, 100% New Zealand Rug Wool remains one of the finest, safest, and most sustainable materials for tufting — combining durability, comfort, and natural beauty in every rug.

This is one of the most common questions we get — and the honest answer is that there isn’t a single rule.

The number of strands you use depends entirely on the type of yarn, the size of the needle hole on your tufting gun, and the density of tufting you’re aiming for.

The General Rule

You want to fill the needle hole of your tufting gun enough so that the yarn sits snugly inside, but can still flow freely.

If there’s too much space around the yarn, it can slip or fall out of the needle while tufting.

If it’s too tight, the yarn won’t feed properly, causing tension issues and uneven pile.

For EFFY Yarns, Here’s Exactly What to Use:


  • EFFY 100% New Zealand Rug Wool: Use 2 strands

  • EFFY 100% Acrylic Rug Yarn: Use 2 strands

  • EFFY Cotton Blend Yarn (80% Cotton / 20% Acrylic): Use 1 strand

Because all of our yarns are specifically engineered for tufting, these strand counts give you perfect flow and density right out of the box — no guesswork required.

Adjusting for Other Yarns or Custom Setups

If you’re using yarns from another brand or experimenting with different fibers, you’ll need to do a bit of trial and error.

Remember:


  • You can adjust your tufting gun’s needle hole to better suit different yarn thicknesses.


    A smaller needle opening works better for thinner yarns (to prevent slipping).


    A wider opening is ideal for thicker yarns or when using multiple strands.


  • We have YouTube videos showing how to adjust the needle hole on your gun — it’s simple once you’ve seen it done.

Density and Backing Matter Too

The number of strands also depends on how densely you want to tuft.

If you tuft closer together, you can use fewer strands for a softer, more flexible rug.

If you tuft with more space between lines, you’ll want more strands for fuller coverage.

The most important thing is ensuring your yarn sits securely in the cloth so that your latex backing can properly grip the fibers and lock them in place.

We’ll cover this in more detail in our FAQ on Backing and Finishing Your Rug.

In short:

There’s no one-size-fits-all rule — but if you use EFFY yarns, we’ve already done the testing for you.

Just follow the strand guide above and you’ll get smooth tufting, even pile height, and beautiful results every time.

How Do I Space My Tufting Lines?

This is another beginner question that doesn’t have a single right answer — and I truly wish it did!

Your line spacing depends on the type of yarn you’re using, the pile height, and the density or feel you want for your finished rug.

General Guideline for EFFY Rug Wool and Acrylic Rug Yarn

If you’re using our EFFY 100% New Zealand Rug Wool or EFFY 100% Acrylic Rug Yarn, here’s a helpful tip:

Look at the foot of your tufting gun — those are the two metal prongs on either side of the needle hole.

As you tuft, line up the right-hand foot prong with the last line you tufted (assuming you’re tufting right-handed).

This will give you a consistent, balanced spacing between your lines — not too close and not too far apart.

For EFFY Cotton Blend Yarn

Because EFFY Cotton Blend is a softer fiber (80% cotton, 20% acrylic), we recommend tufting more densely than the guideline above.

Place your lines slightly closer together to prevent gaps where the tufting cloth could show through.

You’ll develop a feel for this as you go — the best thing you can do is tuft a small test section, then feel the reverse side to judge the density and coverage before starting your full design.

Why Density Matters

If your lines are spaced too far apart, you’ll notice visible gaps or thin spots where the fabric shows through.

If you tuft too densely, your rug can become too compact and rigid, losing its flexibility — especially if you’re using wool, which already has more body.

In extreme cases, over-dense tufting can make a rug feel almost hard, like concrete, once glued and backed.

This is why spacing and density go hand-in-hand — it’s all about balance.

Practice Makes Perfect

At my workshops, I always have students start with a test patch before working on their actual design.

This helps you:


  • See how your yarn behaves in your cloth

  • Feel the difference between loose and tight spacing

  • Learn how your gun handles at different angles and speeds

Tufting evenly spaced lines is a skill that takes time, especially when working around curves and small details.

Give yourself grace — your first few rugs won’t be perfect, but with practice, you’ll get very close!

Color Separation Tips

When tufting different colors next to each other, leave a slightly larger gap between the two lines.

This gives you a little “breathing room” for carving later, creating a crisp, clean edge between colors.

Professional tufters often use loop pile outlines for this reason — because loop pile sits lower than cut pile, it forms a subtle trench that naturally separates colors without being visible from above.

Fixing Mistakes Before Gluing

Don’t worry if your colors bleed together a bit.

You can tidy this up before gluing using a pair of tweezers.

We sell a stainless steel ESD-safe tweezer set, which lets you safely pull stray yarns or adjust edges without static shocks or fiber damage.

This step is often overlooked, but it’s one of the most important finishing touches in rug tufting.

In short:

There’s no single “perfect” spacing — it’s all about feel, yarn structure, and your creative preference.

Start with the foot-prong guide, experiment with density, and don’t forget to test before you tuft your masterpiece.

Provide the answer to the question here.

How do I make a Rug?

The Frame

How to Make a Tufting Frame

Building your own tufting frame is simple and a great way to get started. The best option is to make a square timber frame that’s screwed together for stability. Avoid using nails, as screws hold better and allow for easy adjustments later if needed.

Add feet or brackets at the base so you can clamp the frame securely to a table or workbench while you tuft. Make sure the frame is slightly larger than your finished rug. This gives you space to finish the edges cleanly and helps prevent scratching your hands on the carpet tack or gripper strips. You can also make more than one smaller rug on a single larger frame if you prefer.

Attach carpet gripper strips (also known as carpet edging strips) around the inside edges of the frame with the small nails pointing outward. These grip your tufting cloth firmly in place. You can also use tufting gripper strips, which hold the fabric beautifully and are easy to work with.

If you’re building a large tufting frame and want your cloth to stay tight as a drum for longer periods of time, we recommend using two strips of tack side by side. This gives you more points of contact to grip the cloth securely and helps prevent loosening, especially on bigger frames where restretching can be difficult.

For an even better grip, try using architectural tack strips that have three rows of tacks instead of two. They hold the cloth much more securely and make a noticeable difference in keeping tension consistent across the surface.

We do not recommend the frames sold on Amazon that use twist knobs to clamp the fabric in place. They are not very secure, and on smaller frames you’ll find that you have to restretch the cloth frequently, which becomes frustrating and limiting over time.

Aluminum frames can work well, but they usually only have one row of tacks. They are lightweight and easy to move, but you may find they require more frequent tightening of the fabric between projects.

The important thing to understand about carpet tack strips in general is that parts of your cloth will always be tighter while others are looser. This isn’t due to how you stretch the fabric — it’s simply because there isn’t a tack at every intersection of the fabric’s weave. When you’re tufting, you’ll feel the difference: some areas will feel tighter and cause the gun to bounce back slightly, while others will feel softer and allow the gun to push through more easily.

Gripper strips eliminate this issue entirely because they have more tacks per square inch than there are threads in the cloth’s weave. This ensures the fabric stays evenly stretched across the whole frame and provides a much more consistent tufting experience.

Finally, install a small eyelet or hook above where your tufting gun will sit. Thread your yarn or wool through it — this helps the yarn flow smoothly through the gun and prevents tangling.

If you’d prefer not to build your own, we sell ready-made frames and everything you need in our Ultimate Rug Tufting Starter Pack, or you can purchase the frames separately in our shop.

What Size Tufting Frame Do I Need?

The frame size you need depends on the size of the rug you want to make. If you want to make a 3-meter (about 3.3-yard) rug, you’ll need a frame that’s around 3.3 yards wide.

When planning your frame, it’s really important to think about what tufting fabric sizes are available, as this will save you money and prevent waste. Many people build frames first and then find that no tufting cloth fits properly, which becomes costly over time.

For example, in our U.S. shop, one size of tufting cloth we typically sellthat in 2-yard by 2-yard cuts. We recommend building your frame so a 2-yard by 2-yard piece of fabric fits nicely, leaving at least a couple of inches of extra fabric around the edges. This extra material allows you to pull the cloth tight over the gripper strips for proper tension. If your fabric only just reaches the tacks, you won’t be able to stretch it properly, and the surface may loosen while you tuft.

Tufting Cltoh

What Cloth Do I Need to Tuft On?

There are two main kinds of primary tufting cloth used for rug tufting.

The first is the regular white tufting cloth with yellow guidelines, made from 65% polyester and 35% cotton. This is the classic tufting fabric and works excellently with all the tufting machines that we sell. The yellow guidelines are especially useful for keeping your fabric straight when stretching it onto your frame and for tracing your designs. The main differences between this cloth and our premium option are the fiber content and the construction. The white tufting cloth has a double weft and warp, which gives it a bit more flexibility and makes it easier to stretch and tension on your frame.

The second option is our premium grey 100% polyester primary tufting cloth with white guidelines. This fabric has a single weft and warp, and because it’s 100% polyester, it stretches less while tufting and holds its shape more consistently. It doesn’t sag under the weight of the yarn to the same degree as the white cloth, which helps maintain even tension across your work. Another benefit of the grey polyester cloth is that, because it doesn’t have a double weave, your machine is less likely to get caught in the fabric’s track. This makes it noticeably easier to create curves and smooth lines while tufting.

The 100% grey polyester tufting cloth is an excellent upgrade and well worth the small difference in price. We highly recommend it for anyone wanting the most stable, precise, and professional tufting experience.

Stretching your Fabric and Transferring your Design

Before transferring your design, make sure your tufting cloth is stretched tight as a drum on your frame. This will help keep your lines accurate once you start tufting.

There are several ways to transfer your design:

1. Draw directly onto the back of the cloth

You can use permanent markers, as the lines will be tufted over and won’t show through on the final rug. However, I personally prefer using a water-soluble marker, as it’s cleaner and easier to adjust. With this method, you can either freehand your design or trace from a drawing you’ve created yourself.

2. Use a projector to trace your design

⚠️ Important: When you’re transferring your design onto your tufting cloth, remember to reverse the image. You are drawing on the back of your rug, not the front, so your design will appear flipped when tufted. This is especially important if you’re working with lettering or text — every tufter has made the mistake of forgetting this and ended up with a backwards word!

To use this method, simply project your design onto the cloth and trace around it with a marker.

At this time, EFFY does not sell projectors, as we can’t compete with retail pricing. We recommend investing in a good-quality projector with enough brightness (lumens) to project clearly on large surfaces. Smaller, lower-powered projectors often struggle to display large designs clearly.

3. Use paper or cardboard templates

This method works well for repeat rug styles or simple geometric designs. Create cut-out templates from paper or cardboard, then trace around them directly onto your tufting cloth.

4. Print and trace using a bright light

You can also print your design on paper, tack it to the back of your tufting cloth, and trace over it using a bright light positioned behind the fabric. This isn’t ideal for large projects, but it’s a good alternative if you don’t yet have a projector. Many online poster-printing services can enlarge your design for this purpose.

A few important reminders:

• Always make sure to mirror your design if you’re tufting from the back side of the fabric.

Respect copyright laws. If you’re using someone else’s design, ensure you have permission. Copyrighted characters such as Pokémon and Disney figures are particularly risky, and using them can even lead to social media accounts being shadow banned.

• As a general rule, your artwork should have at least seven points of difference from any other artist’s original design to be considered unique. We always encourage you to create your own artwork — it’s far more rewarding, and other artists work hard to produce their designs too.

• If you’re just starting out, choose a simple design for your first few rugs. This will help you focus on even tufting, spacing, and technique before moving on to finer lines and smaller details.

• Give yourself time to learn and grow — every tufter improves with practice, and patience will lead to better results and longer-lasting rugs.

Getting this part right is very important. Cut your tufting cloth so that it’s approximately 4 inches (10 cm) larger than your frame on all sides. This extra allowance will give you enough fabric to grip and pull tight.

Use the guidelines on your tufting cloth to help you align it straight while attaching it to your carpet tack strips or gripper strips. My personal technique is to start by lightly setting the cloth along the top row of tacks, then slowly work your way around — stretching the fabric onto the side and bottom edges in stages.

If you move around the entire frame gradually, tightening a little at a time, you’ll get a much more even stretch than if you pull one side fully tight right away. Once the cloth is attached all the way around, go around the frame again — two or three more times — re-stretching and tightening as you go.

Your cloth needs to be tight as a drum to withstand the pressure of a tufting gun. If it’s sagging, your design can warp, and the gun can even cut the fabric, since it’s not designed to push into loose material.

You can test your tension by tapping the surface of the cloth with your finger — it should feel and sound tight like a drum.

We also sell a canvas stretcher clamp, which can help you get that final bit of tension perfect. Once you’ve stretched the cloth as tight as you can with your hands, you can use the clamp as a lever to pull the fabric even tighter. This tool has become increasingly popular over the past year and a half, especially for tufters who want professional-level tension without straining their hands.

During the tufting process, as you add yarn to the cloth, you may notice the fabric beginning to loosen or sag slightly — both from the weight of the yarn and the pressure of tufting. This tends to happen more noticeably on smaller frames and when using white primary tufting cloth, due to its cotton content.

As anyone familiar with cotton knows, once it stretches, it tends to hold its stretched shape. If this happens, simply pause and re-stretch your fabric to bring it back to proper tension before continuing.

This won’t distort your design much, since your lines were drawn while the cloth was tight — you’ll simply be bringing it back to its original tension. Once it’s tight again, continue tufting and follow your existing guidelines.

Threading and Tufting

This process is definitely easier to understand visually, but here’s a clear written guide to help you get it right.

1. Make Sure the Yarn Flows Freely

Before anything else, make sure your yarn or wool is flowing freely.

This isn’t just about preventing tangles — it’s about maintaining consistent tension, which is absolutely crucial for tufting.

If there’s too much tension, your yarn may pull out of the gun (especially with cut pile guns), or your pile height may become uneven across your rug.

For the best results:


  • Use EFFY yarns on cones, which are designed to pull evenly.

  • If you’re using skeins, wind them into cakes and pull from the center for smooth, consistent feeding.

We sell two types of yarn winders to make this easy:


  • A small, affordable plastic yarn winder that makes cakes up to 1.8 oz (50 g) — perfect for small projects or testing colors.

  • A heavy-duty metal yarn winder that can handle cakes up to 17.6 oz (500 g) — ideal for larger projects and daily use.

Having your yarn flow freely and evenly into the gun ensures that your tufting runs smoothly, your loops stay consistent, and your finished rug looks professional.

2. Always Turn Off the Machine Before Threading

Before threading, make sure your tufting gun is switched off and the cord is safely out of the way.

Never attempt to thread the gun while it’s powered on — accidentally pulling the trigger can cause the needle to move at high speed and result in serious injury.

3. Feed the Yarn Through the Eyelet on Your Frame

Your yarn should feed from above the gun, not from the side or below.

Run the yarn through the eyelet mounted at the top of your frame (or use a simple hook, clamp, or pulley).

This overhead feed maintains even tension and helps the yarn glide smoothly into the machine.

4. Identify the Two Threading Points on Your Tufting Gun

There are two parts of the tufting gun that your yarn needs to pass through:


  1. The Yarn Guide — This is the small coiled wire eyelet at the top of your gun. It keeps the yarn flowing smoothly and prevents it from catching or rubbing against any parts of the machine.

  2. The Needle Tip — This is the hollow metal needle at the front of your gun that drives the yarn through the tufting cloth.

Both parts need to be threaded correctly for your yarn to feed properly.

5. How to Thread the Tufting Gun


  1. Take your tufting gun threader and insert it up through the needle tip — starting from the open side of the needle (the part that faces you) and pushing it through to the closed side (the back of the needle).

  2. If you’re using our EFFY Tufting Gun Threaders, they’re long enough to reach through the yarn guide as well. Push the threader through both the needle and the yarn guide in one smooth motion.

  3. Loop your yarn through the wire loop at the end of the threader.

  4. Gently pull the threader back through the yarn guide first, and then back through the needle tip, pulling the yarn along with it.

We sell Tufting Gun Threaders in convenient 3-packs, making this step quick and frustration-free.

You can also make your own threader using thin craft wire — just make sure it’s long enough to reach from the tip of the needle through the yarn guide for easy threading.

6. Leave a Small Tail of Yarn Hanging Down

Once threaded, pull about 2 inches (5 cm) of yarn through the needle so a small tail hangs down before you start tufting.

This helps the first few stitches anchor securely into the cloth.

As you gain experience, you can leave shorter tails to reduce waste — every little bit adds up over time.

Tip:

Smooth, consistent yarn flow is the key to great tufting. When the yarn moves freely, your machine runs smoothly, your pile height stays even, and you’ll spend more time tufting and less time rethreading.

While it’s definitely easier to learn visually (and we highly recommend watching our YouTube tutorials), here’s a detailed written explanation to help you get started.

First, make sure everything is set up correctly:


  • Your tufting cloth is stretched tight as a drum.

  • Your frame is securely clamped or braced to your table or stand.

  • Your yarn is threaded properly through the tufting gun.

  • All power cords and connections are clear of your workspace.

Once everything is ready, press the tufting gun firmly into the cloth so that the needle tip goes fully through the fabric before pulling the trigger. You can (and should) put some weight behind this — one of the biggest beginner mistakes I see in workshops is being too gentle. Many people are scared to damage the fabric or frame, but you really do need to apply pressure.

Tufting guns naturally create some resistance as the needle moves through the cloth. You’ll feel the gun bounce back slightly — even with the best machines, this happens. The key is to push through that resistance so the needle continues piercing the fabric smoothly.

Direction Matters

You must always move the tufting gun toward the closed side of the needle.

When you’re first learning, start with vertical lines — this means the gun will be traveling upward, not downward.

This is a common early mistake: most beginners assume you tuft down, but you don’t. Tuft up.

If you try to tuft downward, the yarn won’t anchor properly — you’ll end up with holes in your fabric and a tangled mess of yarn.

Once you’re comfortable, you can also do horizontal lines or even curves — just remember that the machine must always travel in the direction of the closed side of the needle (the open side of the foot).

Controlling the Gun

All EFFY tufting guns include a maneuverable handle that rotates, allowing you to control your gun comfortably with both hands.

This handle is especially useful when working on curves and small shapes, as it gives you far more control over the movement and balance of the gun.

When working on curves, try pulsing the machine instead of running it continuously.

Here’s how:


  • Keep the gun pressed firmly into the fabric.

  • Gently pull the trigger for a short burst.

  • Stop. Adjust your angle slightly.

  • Fire again for another short burst.

This pulsing motion helps create smooth, clean curves and prevents your gun from “getting stuck in the tracks” of the fabric — a common issue, especially with white primary tufting cloth.

Other Key Tips


  • If your cloth starts to loosen or sag, stop and re-stretch it before continuing.

  • Always push the needle fully through the fabric before pulling the trigger. If it’s not through, the yarn won’t anchor and will likely shoot back out — especially in cut pile mode.

  • For loop pile, remember to cut the yarn manually at the end of each line. If you don’t, you’ll pull out the entire tufted line when you move to the next section.

In short:

Push firmly, tuft upward, follow the direction of the closed needle, and pulse for control — especially on curves. Once you get the feel for how the gun moves with the fabric, you’ll find it becomes second nature.

Sealing, Backing, Carving

When you’ve finished tufting with the machine, your rug must be tidied before sealing. This is best done while the rug is still stretched on the frame, because the tension keeps the surface flat and makes all stray threads easy to see and remove.

1. Tidy the Back of the Rug First (The Side You Tufted On)

Begin by inspecting the back of your rug — the side facing you while tufting.

Your goal is to make the back as flat and even as possible, removing anything that would block the latex from penetrating the fibers.

You can tidy the back in two ways:


  • Pull out any dangling threads or tails by hand

    (Carolyn’s preferred method — small amounts of removed yarn do not affect the front of the rug.)

  • Trim the dangling threads with duckbill scissors

    Creates an ultra-flat finish, also fine if that’s your preference.

As you work:


  • Remove any accidental loops or unwanted clumps.

  • Snip or pull anything sitting above the surface that creates bumps or raised spots.

  • Ensure the surface is smooth — this is crucial for proper latex penetration.

A clean, flat back makes all the difference when sealing. Raised bumps prevent the latex from absorbing evenly, which means loose tufts later.

If you need extra context on why this matters, see the FAQs:

How do I seal my rug?, How many strands of yarn do I use?, and How do I space my tufting lines?

2. Tidy the Front of the Rug (Optional but Highly Recommended)

This is your chance to refine your design before sealing, especially if you plan to carve or want clean color separation.

Using:


  • Curved-tip embroidery scissors (we sell these), and

  • ESD-safe stainless steel tweezers (also available in our shop),

…go over the entire front of your rug carefully.

During this step, you can:


  • Remove stray fibers that have jumped into the wrong color areas.

  • Check color separation so that when carving bevels later, your edges stay crisp and clean.

  • Eliminate any blended or fuzzy borders between colors.

  • Ensure that each shape has a clear boundary.

This step is especially important if you want a professional, sharp, well-defined final rug.

If you aren’t carving or aren’t worried about perfect color separation, this step is optional.

Loop-pile–specific note:

If working in loop pile, you cannot tidy in the same way.

Instead:


  • Snip any loops that are much taller than the rest.

  • Snip from the base of the loop, not the top — otherwise you’ll create visible cut-pile speckles that alter the finished look.

This is perfectionist-level detail, but it makes a real difference in the final result.

3. Final Check Before Sealing

Once both sides are tidy:


  • Ensure the back is flat, smooth, and free of tails.

  • Vacuum the back to remove loose fibers.

  • Confirm there are no raised bumps that would interfere with latex penetration.

Now your rug is ready for sealing with latex adhesive — not glue.

(See: How do I seal the back of my rug?)

At All Things EFFY USA, we currently offer our non-slip rug backing fabric, which has quickly become our most popular option for finishing rugs.

This material is a thick felt-style fabric with small silicone dots across the surface. It’s perfect for backing rugs because the silicone dots help keep the rug in place, preventing it from slipping or shifting on hardwood floors, concrete, or even when you’re layering a rug on top of existing carpet. It also gives your rug a neat, cushioned, and professional finish.

As All Things EFFY USA grows, we plan to expand our range of backing options to include a lightweight 100% cotton secondary backing fabric, which offers a softer and more traditional finish, and a mesh backing fabric, which can be glued on to give your rug extra structure and stability.

At EFFY, we always recommend finishing your rugs with rug binding, as the edges are the most fragile part of any rug and can start to fray over time. We currently sell three types of binding materials to help you achieve a strong, clean, and professional edge.

The first is our light gray and white binding, which measures approximately 1.6 inches wide (4 cm).

The second is our darker gray binding, which measures about 1.2 inches wide (3 cm).

Both of these options give a clean, traditional look and can be attached using fabric glue, a glue gun, or spray adhesive if you’re comfortable applying it evenly.

The third type of binding we offer is our industrial-grade edge bonding tape. This is a double-sided adhesive tape reinforced with thin strips of plastic inside, giving the finished edge extra durability. It’s especially useful if you’re creating waterfall edges and want to avoid using glue guns or fabric glue.

A waterfall edge is a finishing technique often used for irregular-shaped rugs. You leave about 2 to 4 inches of extra primary tufting fabric around the edge of your rug, then fold those edges over in small increments to create a smooth, seamless finish. This gives the rug a clean, rolled edge without needing to apply traditional binding.

The industrial-grade edge bonding tape is extremely sticky, so we recommend taking some time to practice before using it on a finished rug. It can take a bit of technique to peel and position correctly. Your waterfall edge should also be the full width of the tape to prevent any exposed adhesive, unless you plan to use that extra stickiness to help secure your backing fabric.

We recommend using spray adhesive when attaching thicker backings like the non-slip felt fabric, as it provides even coverage and a smooth bond.

There’s a short video on YouTube and Instagram showing us using this industrial-grade bonding tape if you’d like to see it in action.

This bonding tape can also replace the need to apply traditional binding over your backing because the reinforced plastic mesh within the tape supports the edges beautifully.

How Do I Seal the Back of My Rug?

We like to call this process sealing, not “gluing,” because you’re not technically using glue — you’re using a latex-based adhesive that locks your fibers securely into the tufting cloth.

Choosing the Right Adhesive

For best results, use a liquid latex adhesive — ideally 100% pure liquid latex.

If you can’t find that, a latex-based compound will work too, as long as it stays flexible once cured.

Please note:


  • Rug backing latex is designed to wick into the fibers and stay soft and flexible.

  • Flooring adhesives (like carpet glue) are for sticking carpet to floors — they harden, crack, and can ruin your rug.

At this time, our U.S. shop does not yet sell rug backing latex, but our New Zealand shop does, and both types can be shipped internationally via DHL.

Many customers buy it once to see the texture, consistency, and drying time — then use that as a reference to find something similar locally.

And honestly, we’re hoping that with enough support for our U.S. shop, we’ll be able to offer these same latex products here in the near future.

Why Liquid Latex Is the Best Option

Liquid latex wicks beautifully up into the base of the yarn, locking it into the tufting cloth while remaining flexible.

You’ll know you’ve done it right if you can see a little latex rising into the base of the fibers — not so much that it seeps through, but enough that the yarn looks sealed from below.

If you don’t see this “wicking,” the fibers aren’t being held properly, and tufts may come out during carving or with use.

Here in Christchurch, New Zealand, where Carolyn, the founder of All Things EFFY, lives, there are several bespoke rug makers who use industrial tufting robots.

They all use the same liquid latex that we sell in New Zealand because it performs so well — strong hold, perfect wicking, and lasting flexibility.

How to Apply the Latex

There are several ways to apply your latex depending on your setup and the consistency of your glue:

1. Paintbrush


  • Ideal for runnier glues like liquid latex.

  • Works great for small rugs or detailed areas.

  • Just remember to clean your brush thoroughly — once latex dries on it, it’s finished.

2. Drywall Scraper or Spatula


  • Carolyn’s preferred method for smaller frames.

  • Lets you move latex around smoothly and evenly.

  • Works best when your frame is positioned horizontally on a table.

3. Paint Spray Gun


  • Perfect for larger rugs or vertical frames, especially with thin, runny glues like our liquid latex.

  • Apply light, even layers and let each coat dry before adding the next.

  • Prevents glue from pooling and wicking too far up the fibers (causing “glue dots” on the front).

4. Disposable Gloves (Manual Application)


  • Great for thicker glues.

  • Lets you physically work latex deep into the fibers with your hands.

  • A bit messy, but gives great control — just wear gloves and work fast.

Application Tips and Edge Sealing


  • Apply latex while your rug is still stretched on the frame. This gives better access to the fibers and ensures full penetration.

  • Apply latex beyond the edge of the tufted area — go about 2 inches (5 cm) past the last row of tufts.

    This ensures you don’t miss the edge fibers, which are the most vulnerable to pulling and fraying over time.

  • Both types of EFFY latex (liquid and thick) remain tacky once semi-dry.

    You can use this tackiness to your advantage when finishing edges — fold the edges of your rug over while the latex is still tacky and it will stick to itself perfectly, eliminating the need for extra glue or tape.

You don’t have to fold your edges if you prefer a clean cut right to the last tufted row — but folded edges add durability and protect the most fragile part of your rug.

Drying and Curing Times


  • EFFY Liquid Latex: Dries tacky in 15–20 minutes with a fan heater, fully cures in a few hours.

  • EFFY Thick Latex: Tacky after 24 hours, fully cured in up to two weeks depending on humidity.

If you’re in a hurry, you can remove the rug from the frame once tacky, but drying it while stretched ensures the fibers stay tight and uniform.

Important Notes for Grey Primary Tufting Cloth

Because grey primary tufting cloth has a single weft and warp, it’s more open than the white version.

If you use pure liquid latex, move it around quickly as you apply it. Letting it pool can cause glue dots to appear on the surface.

To avoid this:


  • Apply in thinner, fast-moving layers.

  • Use a spray gun for the most even finish.

This issue is rare but happens when the latex sits too long in one spot or is applied too thickly.

Why Flexibility Matters

The backing of your rug needs to stay flexible.

Latex-based adhesives flex with the rug, preventing cracking, flaking, and stiffness.

Non-flexible glues will harden and eventually crumble, especially if your rug is rolled or walked on frequently.

Even latex-backed rugs can dry out over time. After 3–5 years, it’s completely normal to reapply a light coat of latex to keep the backing fresh and supple.

We recommend using spray adhesive to attach your secondary backing — that way, it can be peeled off easily if you ever need to reapply latex in the future.

A Note on PVC Glue

PVC glue (common school glue) can work for wall hangings or decorative rugs that won’t be walked on or rolled up.

However, it’s not suitable for floor rugs — it can harden and even degrade fibers over time, making them weaker and more brittle.

In short:

Seal your rug using a flexible, latex-based adhesive and apply it evenly across the back — including beyond the edges of the tufted area.

Use the tackiness of the latex to fold and secure your edges, and always choose a glue that allows your rug to remain flexible and breathable.

Done right, your rug will be strong, smooth, and long-lasting — ready for years of use without cracking, shedding, or curling.

Rug carving is the process of shaping and refining the front of a cut pile tufted rug using either scissors or an electric carving tool. Carving can:


  • Define lines by angling the edges of shapes

  • Add dimension and 3D sculpting to your artwork

  • Even out the pile for a smooth, professional finish

Carving is optional—tufted rugs are artworks, and the choice to carve is completely yours. Some artists love a soft, plush uncarved look, while others enjoy sharp color separation and dimensional detail.

Carving Loop Pile Rugs

Loop pile rugs can be carved, but with caution:


  • Any carving tool will cut loops, instantly turning them into cut pile.

  • Having loop pile and cut pile side by side creates a noticeable textural difference.

If you want to keep the clean loop-pile look:


  • Snip only uneven loops at the base, so the cuts remain hidden

  • Use tweezers to separate tangled loops so they sit neatly and vertically

  • Avoid carving unless you intentionally want mixed textures

Carving Tools We Offer

We offer a wide range of carving tools depending on your material, technique, and budget.

Scissors for Carving


  • Bent Tip Scissors – Great for beveling edges

  • Curved Tip Scissors – Perfect for sculpting and shaping

  • Duckbill Scissors – Ideal for removing excess pile cleanly

  • 8-inch Heavy-Duty Fabric Scissors – For trimming large areas or shaping wool and acrylic

Electronic Carving Tools

Rosewood Carver


  • Suitable for cotton, acrylic, and wool

  • Works with all EFFY yarn types

  • Great for beginners through advanced tufters

Heavy-Duty Carver


  • Designed for frequent rug-makers using rug wool or acrylic rug yarn

  • More powerful than the Rosewood Carver

  • Cuts through dense rug fibers with ease

  • Not compatible with EFFY Cotton Blend (blade spacing is too wide)

Wireless Carver (Rosewood Blade)


  • Battery-powered version of the Rosewood Carver

  • Offers full mobility while carving

  • Excellent for carving on the frame

⚠️ Note on Frame Carving:

Carving while your rug is still stretched tight on the frame gives extremely crisp detail—but it is much easier to accidentally cut your cloth. Holes in tufting cloth can be repaired, but it's not ideal. We generally recommend this technique only once you are comfortable handling an electric carver.

Professional-Grade Electronic Carving Tools (Factory-Direct Options)

Available via factory-direct shipping through FedEx (11–15 business days). Not stocked in the U.S. warehouse.

CPI Rug Shearing Plate

A large flat shear used to level rugs to a perfectly even pile height.


  • Adjustable blade depth

  • Best for rugs larger than 40" × 40" (1 m × 1 m)

  • Can be difficult to control on small or irregular rugs

450W Shears with Carving Guide

A mid-range upgrade between standard carvers and a CPI plate.


  • Faster shearing

  • Adjustable depth guide

  • May leave faint lines depending on technique

Electric Rug Carving Scissors

Powered scissors excellent for detailed, controlled carving.


  • Great for carving between colours and shaping grooves

  • Remove less bulk for gradual sculpting

  • Use carefully; cut-resistant gloves recommended

V-Groove Carver

Cuts a clean 45° beveled groove for sharp outlines and dimensional separation.

Pneumatic Carver

For tufters with air-compressor setups (e.g., AK-III, ZQ-III).


  • Fast and precise

  • Small blade for excellent control

  • Ideal for detailed or frequent carving

Still Not Sure Which Tool Is Right for You?

You can visit the product pages on our website to learn more about each carving tool.

If you still have questions or would like personalised advice, you're always welcome to email us or call us using the contact number listed on our website.

There are many different ways to finish, back, and bind a tufted rug—every tufter has their own preferred technique.

This is our suggested method, based on what we’ve found creates high-quality, long-lasting rugs using a reliable, beginner-friendly, and professional-looking approach.

Once your rug adhesive has fully dried and you’ve finished carving and evening out the front, it’s time to finish the edges and add your secondary backing for strength, stability, and a clean professional look.

1. Prepare the Edges of Your Rug

Before finishing:


  • Trim the tufting cloth to about 1 inch (3 cm) from the edge of the yarn/wool

  • Cut evenly all the way around

2. Fold and Secure the Edges of the Tufting Cloth


  • Cut a small triangle from each corner so the cloth folds smoothly

  • Fold the cloth edges over toward the back so the edge of the yarn/wool becomes the visible border

Gluing Options

If you used a latex adhesive (like the ones we sell in New Zealand) or any glue that dries tacky:


  • And you extended the glue 1–2 inches (2.5–5 cm) beyond the wool edge,

  • You can simply fold the tufting cloth into the dried tacky adhesive, and it will stick securely without any extra glue.

If your adhesive doesnot dry tacky:

Secure the folded edges using:


  • Fabric glue, or

  • Spray adhesive, or

  • A glue gun

You can also use industrial-grade edge bonding tape for additional reinforcement.

3. Cut and Apply the Secondary Backing


  • Lay the secondary backing cloth over the rug

  • Cut it to sit just inside the yarn/wool border

  • Apply spray adhesive to both the rug and the backing

  • Press the backing firmly into place

4. Apply the Professional Rug Binding

You can attach rug binding using several methods:


  • Fabric glue

  • Spray adhesive

  • A glue gun

  • Or, if you are using our iron-on binding (available in Canada), you can simply iron it on to activate the adhesive backing

Make sure the binding sits neatly over the folded tufting cloth and the secondary backing. Trim corners so it lies flat and meets cleanly edge to edge.

Your Rug Is Complete

Once the glue (or iron-on adhesive) has fully set, your tufted rug is finished and ready to use or display.

If you’d like to display your tufted piece as a wall hanging rather than use it on the floor, the finishing process is slightly different.

1. Seal and Finish the Front of the Rug


  • Completely seal the back of the rug with your adhesive

  • Allow it to dry fully

  • Carve and tidy the front as desired

2. Fold and Glue the Tufting Cloth Edges


  • Turn the tufting cloth edges over toward the back of the rug

  • Cut small triangles from the corners so the cloth sits flat

    or fold the corners neatly before gluing

  • Glue the folded edges down so you have a clean border

(For wall hangings, you do not add a secondary cloth backing.)

3. Mounting Options

Depending on the style you want, there are several ways to hang your rug:

A. Full Wooden Backing (Most Secure)


  • Cut a wooden backing slightly smaller than the rug

  • Attach the rug using tiny nails or staples hammered from the front into the board

  • Add screws or hanging hardware to the back of the board

Ideal for larger rugs or anything heavy.

B. Top Rod or Dowel (Lightweight, Tapestry Style)


  • Attach a wooden strip or dowel to the top of the back of the rug

  • Tie or attach string, rope, or wire to the dowel for hanging

Great for softer, more fabric-like wall hangings.

C. Glue-On Hooks (Quick & Simple)


  • Glue picture hooks or mounting hooks directly onto the back of your rug

  • For extra protection, place a small piece of felt over each hook to prevent it from scratching or damaging the wall

This method is easy, low-profile, and works well for medium-sized rugs.

If you’d like to turn your tufted piece into a cushion or pillow instead of a floor rug, the finishing steps are slightly different.

1. Seal and Finish the Rug Front as Usual


  • Seal the back with adhesive

  • Allow it to dry completely

  • Carve and shape the front as desired

This part is the same as finishing a regular rug.

2. Leave Extra Tufting Cloth for Sewing

When trimming the tufting cloth:


  • Leave about 2 inches (5 cm) of cloth around the edge

  • This extra allowance gives you enough fabric to sew your cushion together later

⚠️ Important:

Tufting cloth frays easily, so overlocking/serging the edges (if you can) will make sewing much easier and prevent unraveling.

3. Prepare the Cushion Backing Fabric

For cushions, you do not use the same secondary backing as you would for a floor rug.

Instead:


  • Choose a strong woven cotton or canvas-style fabric

  • Cut it to match the size of your tufted piece, including the extra tufting cloth edge

4. Sew the Cushion Together


  • Place the tufted front and the backing fabric right-sides together

    (The finished tufted surface should be facing inward.)

  • Using a sewing machine with a zipper foot, sew:


    About ⅓ of the opening side,


    Then all the way around the other three sides,


    Then another ⅓ back along the opening side


Leave the final third unsewn — this is your opening to turn the pillow right-side out.

A zipper foot helps you sew as close as possible to the edge of the tufted wool/yarn without catching pile in the stitches.

5. Turn, Stuff, and Close


  • Turn the pillow right-side out

  • Stuff it with pillow filling of your choice

  • Hand-sew the remaining opening closed

You now have a finished tufted cushion or pillow!

Frequent problems

With modern tufting machines — especially the AK-V — tearing your cloth is much less common than it used to be. If you have not made any adjustments to your machine, it is actually quite difficult to rip your cloth unless the machine is being used incorrectly.

Most tearing issues were more common in older 2019–2020 machine models. Today’s machines have significantly improved engineering, updated scissors, better foot alignment, and smoother movement — all of which greatly reduce the risk of rips.

However, once you begin adjusting your machine, even being 1–2 mm out of alignment can affect how the cycle operates, how the scissors open and close, and how the needle enters the cloth — which can lead to ripping.

We have helpful reels on Instagram that walk through how to check and correct the cycle, including scissor opener and scissor closer positioning.

Below are the most common reasons your cloth may rip:

1. The Cloth You’re Using Isn’t Strong Enough

The fabric you use matters.

We recommend tufting cloth that is either:


  • 65% polyester / 35% cotton, or

  • 100% polyester (like our primary tufting cloth)

Cheaper or untested fabrics can rip very easily — especially:


  • 100% cotton

  • Hessian/jute, which can also damage your machine because the weave does not open properly for the needle.

2. Your Cloth Isn’t Stretched Tight Enough

Your cloth must be stretched tight as a drum.


  • Loose cloth drags on the needle

  • It causes skipping, dragging, and tearing

  • On carpet-tack frames, the cloth loosens as you work and must be re-stretched periodically

This is one of the most common beginner issues.

3. You’re Overworking One Area

If you repeatedly tuft the same spot or spend too much time trying to “fix” an area, the fibres can break down.

We recommend working in small areas first, then building outward, rather than repeatedly punching the same section.

4. You’re Moving the Machine in the Wrong Direction

Always tuft:


  • Upward, or

  • Toward the closed side of the needle

Tufting in the wrong direction drags the cloth and creates tears.

5. Avoid Curves Until You’re Confident

Curves are one of the easiest ways to accidentally tear cloth when you’re still learning.

Instead:


  • Build curves using small horizontal or vertical lines

  • Attempt true curves once you have full control of the machine movement

6. Your Foot Placement Might Be Off

If the foot is positioned incorrectly, it can drag or press too hard against the cloth.


  • Move the foot slightly forward or backward

  • Even tiny adjustments (1–2 mm) can make a huge difference

  • Foot issues are especially common if the pile height has been altered

Incorrect foot pressure or angle can cause ripping, drag, or skipping.

7. Check That Your Scissors Are Closing Properly

If the:


  • Scissor opener, or

  • Scissor closer

has shifted even a small amount, your scissors may not be opening and closing correctly. This causes:


  • Snagging

  • Dragging

  • Ripping

  • Incomplete cuts

  • Missed stitches

This often happens after someone adjusts their machine without fully understanding the cycle of the machine.

Even a 1–2 mm misalignment can throw the entire cycle off.

We have Instagram reels showing:


  • How to check the machine cycle

  • How to check scissor opener/closer position

  • How to correct the cycle safely

Still Having Trouble?

If you’ve checked everything above and you’re still experiencing tearing, feel free to reach out to us at:

📧 hello@allthingseffy.com

We’re always happy to help you troubleshoot your machine.

All tufters have their own way of handling holes in tufting cloth.

These are two methods we’ve found work well, but you’ll find plenty of other techniques online.

Carolyn’s personal preference is to sew holes closed — or simply restart the piece if the hole is bigger or the project isn’t too far along. Patching works for some people, but in Carolyn’s experience you can almost always see where the patch is, so she generally doesn’t like that method.

If you ever want more tips and ideas, YouTube, Instagram, and TikTok are full of tufters sharing every imaginable repair technique.

Below are the two approaches we recommend:

1. Sew the Hole Closed (Best for Very Small or Medium Holes)

This is the method we use most often.


  1. Stop tufting immediately when you notice the hole.

  2. Grab a curved needle (often sold as a mattress needle) and a strong thread or strip of tufting cloth fibre.

  3. Gently stitch the hole closed, pulling the cloth together without distorting it.

  4. Once secure, tuft very carefully around the repaired area — avoid punching directly into the stitched section if possible.

✔ Needle Recommendation

We recommend the curved mattress needles from Birch Creative (Australia & New Zealand).

To see what they look like, search “Birch Creative Mattress Curved Needle.”

You can find similar curved needles in Canada and elsewhere.

⚠ A Note About Gluing After Sewing

Once cloth has been damaged and sewn, be very careful during the sealing stage.

Excess adhesive can wick through the weakened fibres and create visible glue spots on the front of the rug.

2. Patch the Hole (Best for Medium Holes When Sewing Won’t Work)


  1. Finish tufting the rest of the piece first.

  2. Cut a small patch from another piece of tufting cloth.

  3. Position the patch behind the hole.

  4. Secure it by either:


    sewing it in, or


    gluing it in with fabric glue, spray adhesive, or another strong adhesive.


Once fully dry, you can tuft gently over the patch.

⚠ Personal Note

Carolyn generally dislikes this method because patches are often visible — but it does work, and many tufters prefer it.

3. When Should I Restart?

If the hole is large, or if it happens early in the project, restarting is often the cleanest and least frustrating option.

This is typically what we recommend in our workshops because a big repair:


  • can distort the rug

  • creates weak areas

  • may cause glue seep-through

  • can remain visible even after carving

Sometimes restarting saves hours of struggle later.

Here are some common reasons why this might be happening:

1. You Aren’t Pushing Hard Enough

Tufting guns can feel intimidating when you’re new, and beginners often tuft too gently.

But you must push firmly into the cloth to make sure the needle enters the fabric fully and the yarn anchors correctly.


  • Press the gun hard into the fabric

  • Keep the foot completely in contact with the cloth at all times

  • If you’re using the correct tufting cloth, you can apply a lot of pressure — far more than most beginners realise!

A confident, firm pressure makes a huge difference.

2. You’re Tufting in the Wrong Direction

You must always tuft:


  • Upwards, or

  • Toward the closed side of the needle

If you tuft downward or backward, the yarn will not anchor and will simply fall out.

Direction matters.

3. You’re Using Inferior or Incorrect Fabric

Using high-quality tufting cloth solves a massive number of problems.

We recommend:


  • 65% polyester / 35% cotton, or

  • 100% polyester primary tufting cloth

Inferior fabrics (especially 100% cotton or hessian/jute) do not hold yarn well and often cause stitches to fall out or skip.

4. Your Cloth Isn’t Stretched Tight Enough

Your tufting cloth needs to be stretched as tight as possible — truly drum tight.


  • Loose cloth makes the yarn fall out

  • Loose cloth can cause skipping and dragging

  • Cloth loosens as you work, so you must re-stretch it frequently

A properly stretched frame makes a huge difference in how well the yarn stays in.

If your yarn or wool keeps slipping out of the tufting gun and you have to constantly re-thread it, here are the most common reasons why — and how to fix them.

1. Something Is Interrupting the Smooth Yarn/Wool Flow

Your yarn must move freely from the cone (or cake) to the gun.

Check for:


  • The gun cord getting tangled in the yarn

  • The cone falling over

  • A skein catching or tightening

  • Yarn snagging on the frame, eyelets, or other yarn

  • Yarn buried under layers on the cone

We strongly recommend using:


  • a cone, or

  • a cake on a Spinning Yarn Holder

    for smooth, consistent feeding.

2. The Yarn/Wool Is Tangled at the Frame Eyelet

If the yarn wraps or snags at the eyelet, it tightens and pulls out of the gun.

Make sure the yarn path from cone → eyelet → gun is completely unobstructed.

3. Your Yarn/Wool May Be Too Thin — or the Needle Tip Size Is Incorrect

This is extremely common and very fixable.

If the yarn is too light, too skinny, or too slippery, or if the needle tip hole is set too large for the yarn you’re using, the yarn may fall out simply because:

There’s a gap around the yarn inside the needle tip,

so the yarn has nothing to grip against. Any small movement or tension can make it slip out.

How to Fix This

Option 1: Adjust the Needle Tip Hole Size

You can very easily adjust the size of the needle hole tip on your machine.

This allows the yarn to fit more snugly in the hole so it doesn’t fall out.

(We explain this process in the Tufting Yarns section of this FAQ.)

Important:

The yarn should:


  • Fill the needle hole,

  • But still glide smoothly,

  • With just the smallest amount of friction,

  • Not a loose gap around it.

Even a tiny gap makes it very easy for the yarn to pop out.

Option 2: Use More Yarn / Heavier Yarn

Thin yarns (especially thin cottons) often require:


  • Multiple strands

  • Or a heavier yarn type

Thin yarn has too little weight to anchor or stay threaded.

If you’re unsure about yarn sizes:


  • We sell three different yarn types

  • Buying a cone (or two) gives you a perfect reference for the correct thickness for your gun

  • Once you know what “typical tufting yarn thickness” feels like, everything becomes easier

For extra weight, we often recommend two strands of Romney 8ply.

4. Use This Trick to Avoid Re-Threading

To prevent the yarn from popping out every time you remove the gun from the cloth:


  1. Pause before removing the gun

  2. Pull it out slowly

  3. Catch the two ends of yarn with your fingers

  4. Give a small tug on the yarn going back to the cones to ensure nothing is stuck

You mentioned you'll add a video for this — we can link it once it’s ready.

FAQ

Section heading

Provide the answer to the question here.

Provide the answer to the question here.

Provide the answer to the question here.

Section heading

Provide the answer to the question here.

Provide the answer to the question here.

Provide the answer to the question here.

Got a question we didn’t answer?

Ask us all your arts and crafts related questions, we love yarning to you about our passion for anything creative.

Net Orders Checkout

Item Price Qty Total
Subtotal $0.00
Shipping
Total

Shipping Address

Shipping Methods